Configuring AD Authentication
Onepoint can be accessed through the AD users, below you will have step by step how this configuration is done.
NOTE: To perform this configuration it is necessary the LDAPS enabled.
Directory Backend
1- In Onepoint, go to Settings > Backends.
2- Click New.
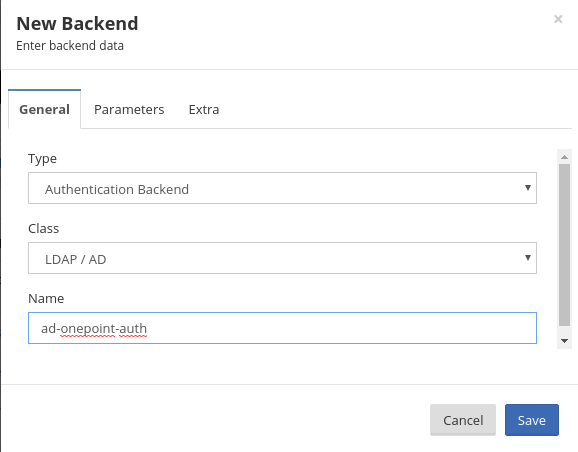
3– Select type Directory Backend, Select Class LDAP/AD , Name: ad-”domain”.

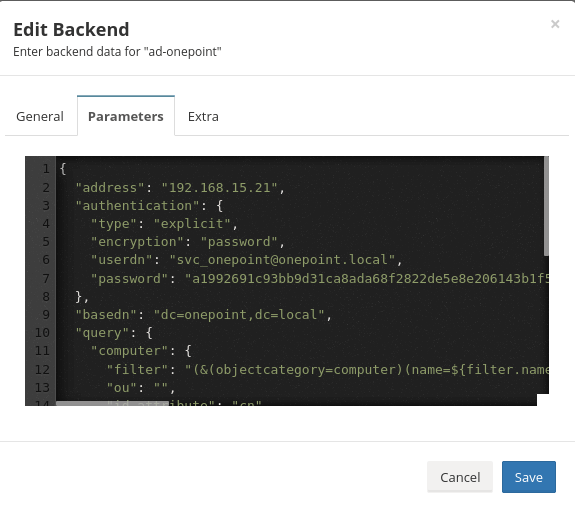
4- In parameters, fill in the settings with the DC data.
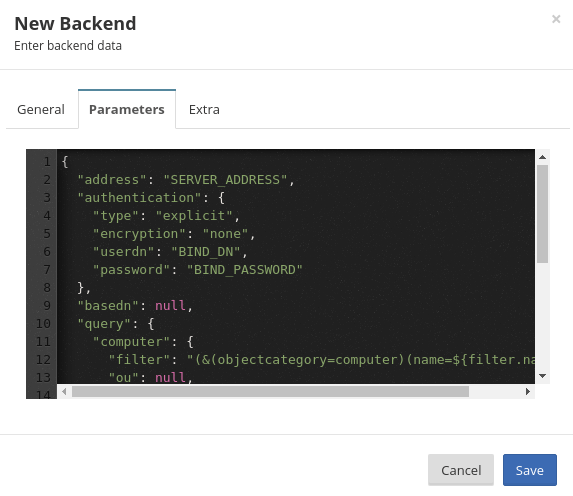
 {
   "address": "192.168.15.21",
   "authentication": {
     "type": "explicit",
     "encryption": "none",
     "userdn": "[email protected]",
     "password": "********"
   },
   "basedn": "dc=onepoint,dc=local",
   "query": {
     "computer": {
       "filter": "(&(objectcategory=computer)(name=${filter.name}))",
       "ou": "",
       "id_attribute": "cn"
     },
     "user": {
       "filter": "(&(objectcategory=user)(samaccountname=${filter.name}))",
       "ou": "",
       "id_attribute": "samaccountname"
     },
     "group": {
       "filter": "(&(objectcategory=group)(samaccountname=${filter.name}))",
       "ou": "",
       "id_attribute": "samaccountname"
     }
   }
 }
NOTE:The information above is demonstrative, filling has to be done according to the information of your domain.
- After having performed the configurations shown above click on save.
5- The userdn password can be encrypted, so that others do not know what the password is.
- In Onepoint, go to Settings > Encrypt String for encrypting, “password” and save the resulting value.
- In Onepoint, go to Settings > Backends, edit “Directory Backend” In Parameters tab, edit the encryption field for password, in the password field paste the previously encrypted value.
- Click save after making the settings.
Authentication Backend
1- In Onepoint, go to Settings > Backends.
2- Click New.
3- Select type Authentication Backend, Select Class LDAP/AD, Name: ad-“domain”-auth
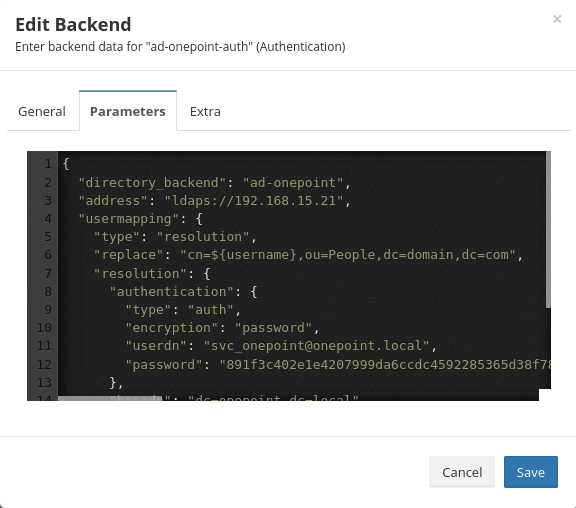
4- In parameters, fill in the settings with the DC data.

 {
   "directory_backend": "ad-domain",
   "address": "ldaps://127.0.0.1",
   "usermapping": {
     "type": "resolution",
     "replace": "cn=${username},ou=People,dc=domain,dc=com",
     "resolution": {
       "authentication": {
         "type": "auth",
         "encryption": "none",
         "userdn": "user@domain",
         "password": "*****"
       },
       "basedn": "dc=onepoint,dc=local",
       "condition": "(&(objectCategory=user)(samaccountname=${username}))"
     }
   }
 }
NOTE:The information above is demonstrative, filling has to be done according to the information of your domain.
- after having performed the configurations shown above click on save.
5- The userdn password can be encrypted, so that others do not know what the password is.
- In Onepoint, go to Settings > Encrypt String for encrypting, “password” and save the resulting value.
- In Onepoint, go to Settings > Backends, edit “Authentication Backend” In Parameters tab, edit the encryption field for password, in the password field paste the previously encrypted value.
- Click save after making the settings.
AD login priority.
To make login at onepoint a priority with AD, perform the procedures below.
1- In Onepoint, go to Settings > System Properties.
2- Click New.
3- Define the Name: system.default.backend.authentication.ui, Value:ad-“domain”-auth.
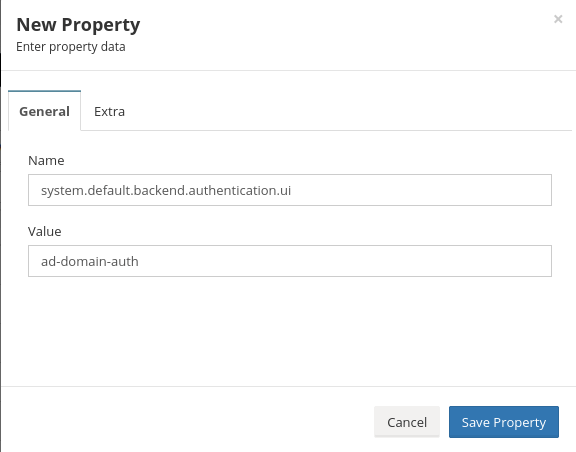
4- Click save property.
5- Onepoint log off, note the Authentication Backend field on the home screen.
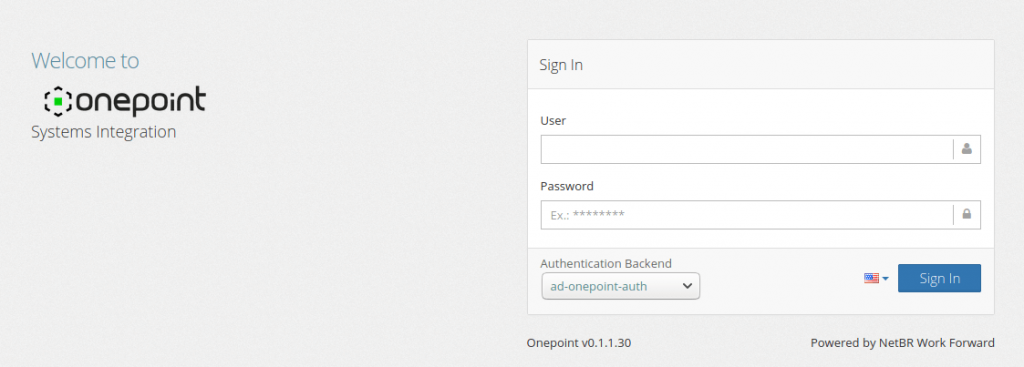
6- To test if it happened, enter the onepoint with an ad user.